

Appearance
Installation
For merchants
From zero to a verified test payment, then live.
Requirements
- Shopware 6.6 or 6.7, PHP 8.2+.
- A Paystack account. A test account is enough to start.
- Your shop on HTTPS with a public domain that is configured on a sales channel — Paystack must be able to reach the webhook URL.
- A database backup before installing on a live shop.
1. Install the plugin
Option A — Composer (recommended)
From your Shopware project root:
bash
composer require "kommandhub/paystack-sw:^0.9@beta"The @beta flag is required while the plugin is in beta; without it, a project with "minimum-stability": "stable" refuses the package. See Shopware's guide on installing extensions with Composer for background.
Option B — ZIP upload
- Get the release ZIP for version 0.9.0-beta.2.
- In the Administration, open Extensions → My extensions and click Upload extension (Shopware: My extensions).
- Select the ZIP.
2. Activate
bash
bin/console plugin:refresh
bin/console plugin:install --activate KommandhubPaystackSW
bin/console cache:clear
Or in Extensions → My extensions: Install, then switch the plugin active.
Activation creates:
- the payment method Pay with Paystack (technical name
kommandhub_paystack_payment), active but not yet assigned to any sales channel; - the customer custom-field set Paystack Bank Fields (used only if you enable bank details).
The plugin ships no database migrations and needs no background worker.
3. Get your Paystack keys
In the Paystack dashboard, Settings → API Keys & Webhooks, copy the Test Secret Key (sk_test_…). You will need the Live Secret Key (sk_live_…) when going live. There is no public-key setting — the plugin talks to Paystack from your server.
4. Configure the essentials
Extensions → My extensions → Paystack Payment by Kommandhub → Configure, on All Sales Channels:
- Enable Sandbox Mode — on.
- Test Secret Key — paste
sk_test_…. - Click Save.
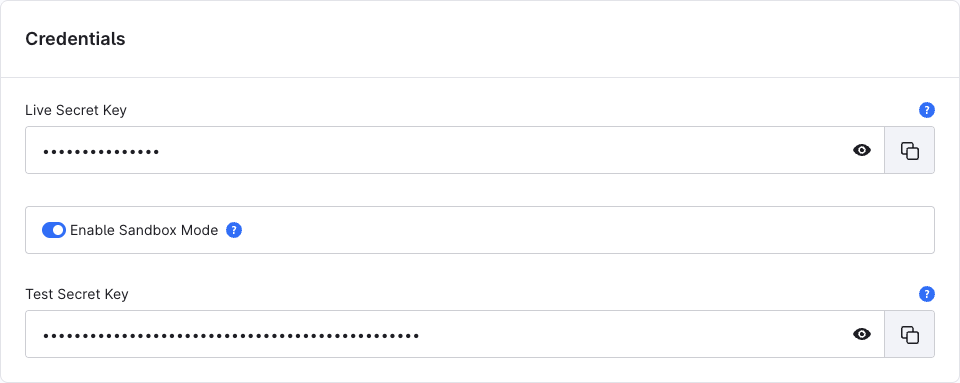
Everything else is optional — see Configuration.
Save keys on "All Sales Channels"
Webhook signatures are checked against the key on All Sales Channels. Keep one Paystack account per installation.
5. Register the webhook
In the Paystack dashboard, Settings → API Keys & Webhooks, set the Test Webhook URL:
text
https://<your-shop-domain>/paystack/webhook- Use a domain configured on a Shopware sales channel — Shopware rejects requests to unknown domains with
400before the plugin sees them. - Basic auth or maintenance mode in front of the shop blocks webhooks.
The webhook marks orders paid when a customer does not return from Paystack, and it drives refunds.
6. Offer the payment method
Activation creates Pay with Paystack, but no storefront offers it yet.
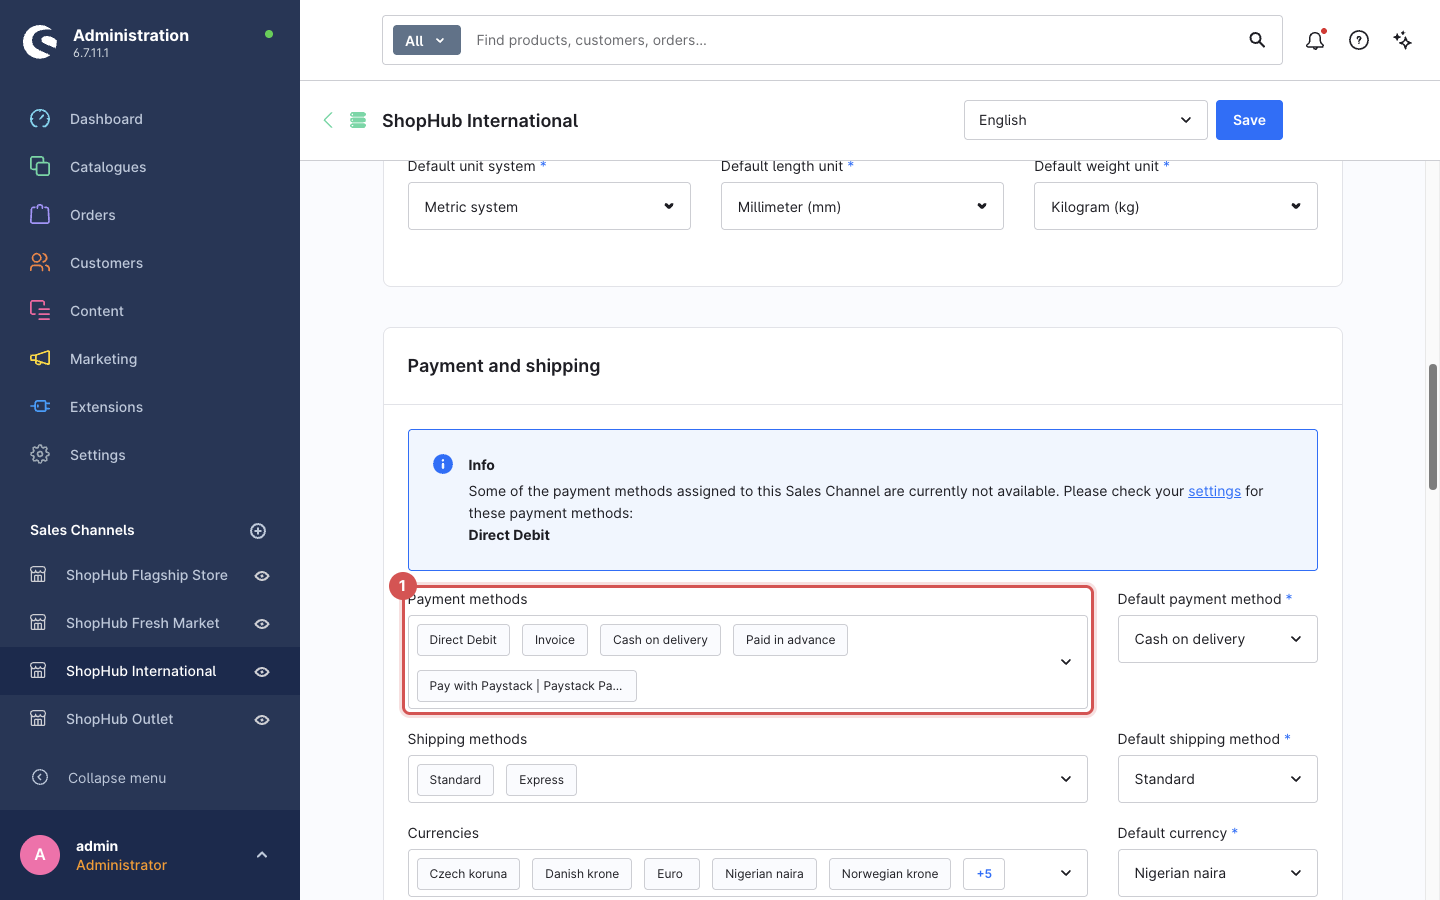
- In the left menu under Sales Channels, click your storefront. On the General tab, find Payment and shipping.
- Add Pay with Paystack to Payment methods. Optionally make it the Default payment method.
- Click Save. Repeat for every storefront that should offer Paystack.
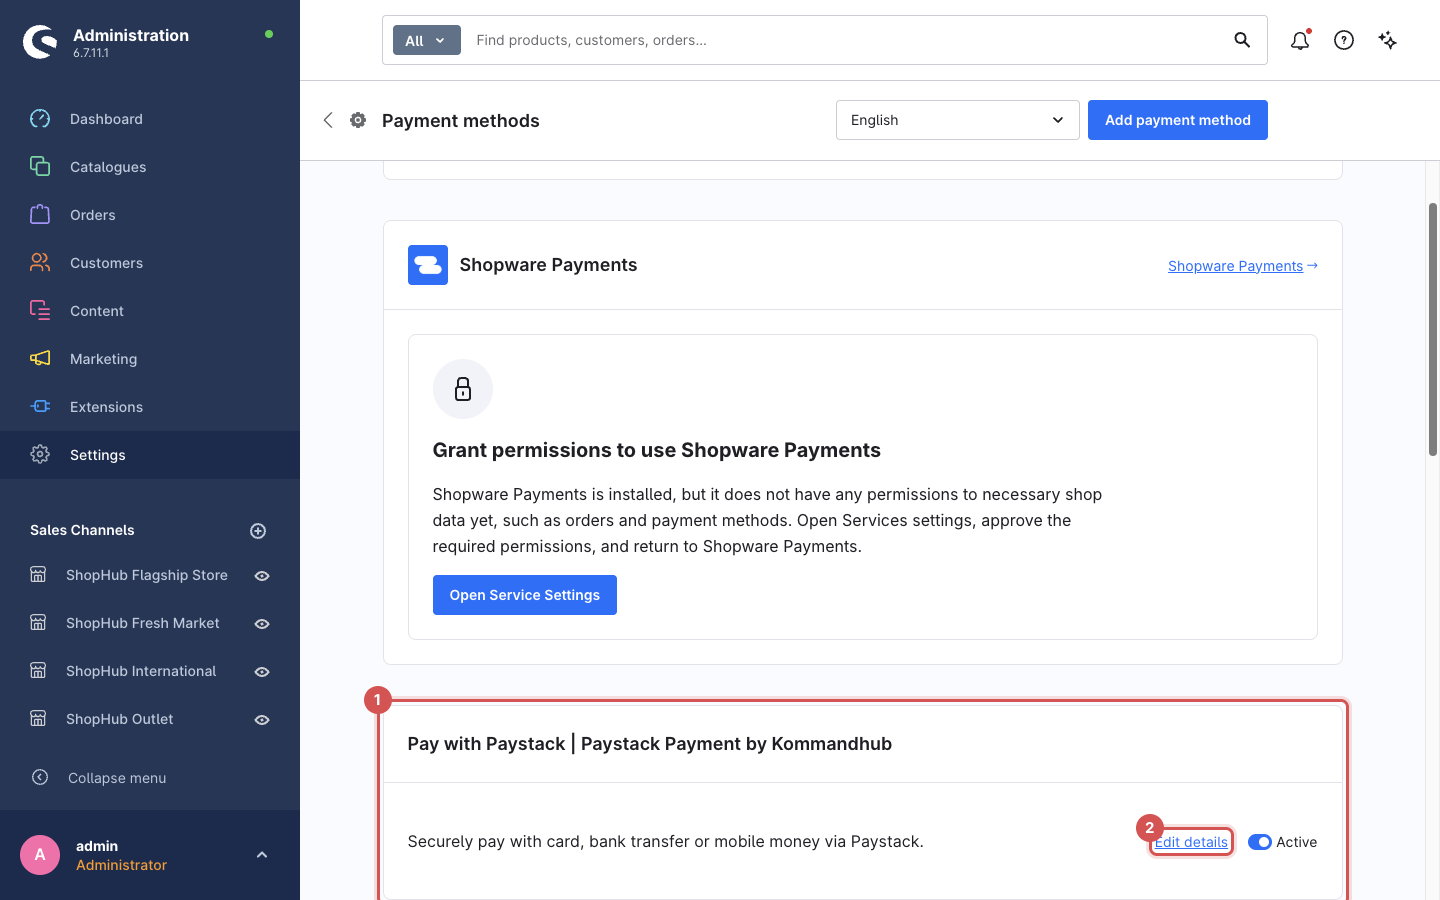
To rename the method, change its description or add an image, open Settings → Shop → Payment methods and click Pay with Paystack (Shopware: Payment methods).
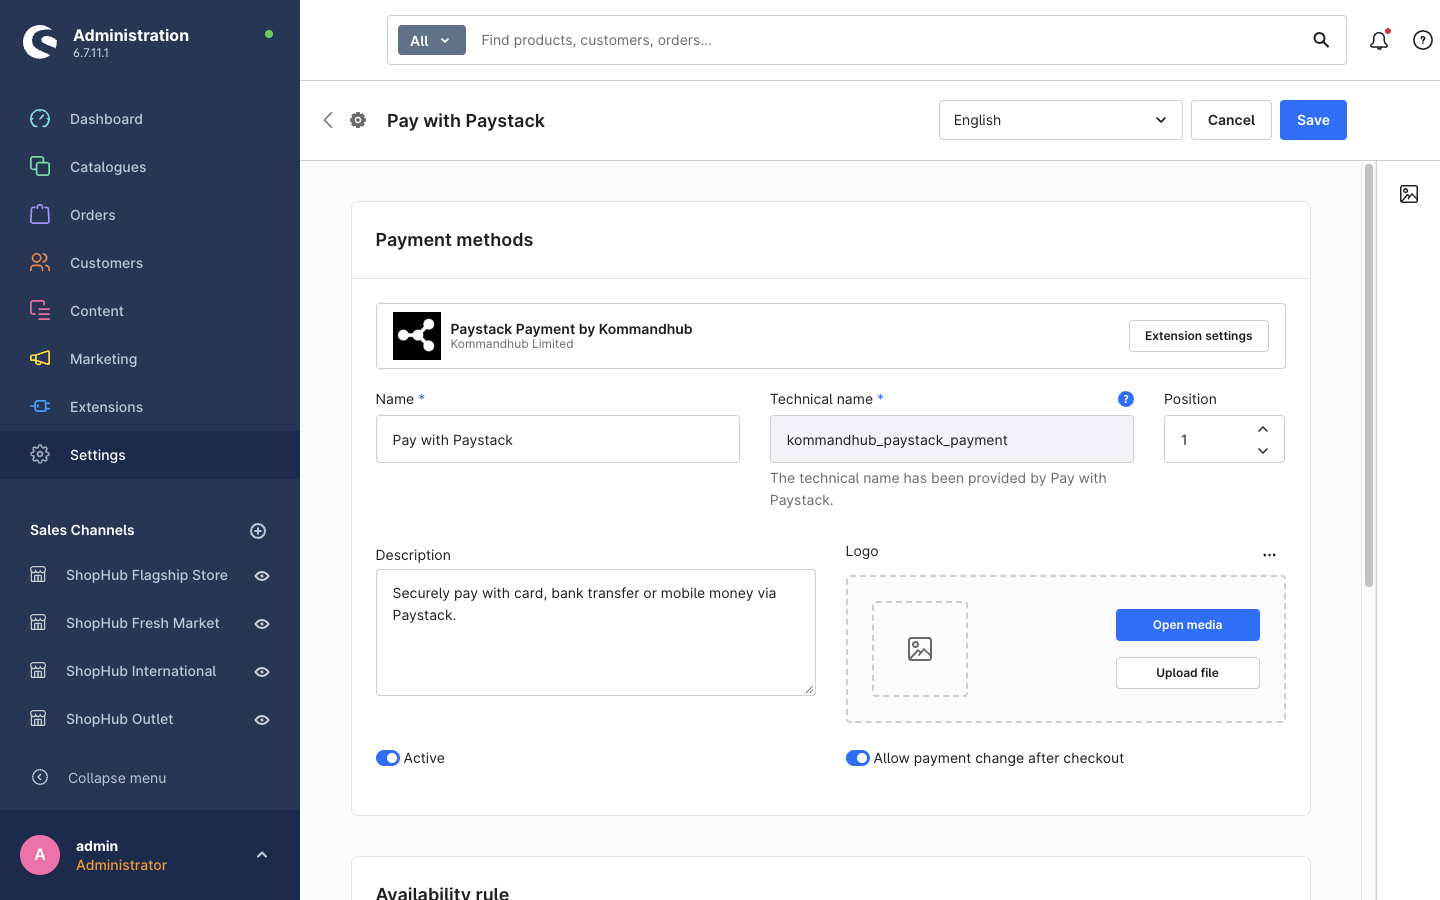
Keep Active and Allow payment change after checkout on. The second lets a customer whose payment failed pay again from their account. Extension settings on this page opens the plugin configuration.
7. Verify
- In the storefront, place an order with Pay with Paystack — step by step in Taking payments.
- On Paystack's test page, choose Success, or pay with a Paystack test card.
- You return to the order confirmation page.
- In the Administration, open the order: payment status Paid; the Paystack tab shows reference, channel, fee and verification time.
- Webhook check: pay for a second order and close the Paystack page instead of returning. The order must still become Paid within a minute. In the Paystack dashboard the delivery shows response
204.
If a step fails, see Troubleshooting.
8. Go live
- Paste the Live Secret Key; turn Enable Sandbox Mode off.
- Set the Live Webhook URL in the Paystack dashboard (same URL).
- Grant Process Paystack refunds to staff roles — see Refunds.
- Turn off Enable Detailed Logging if you used it.
- Make and refund a small real payment.
Updating
bash
composer update kommandhub/paystack-sw
bin/console plugin:refresh
bin/console plugin:update KommandhubPaystackSW
bin/console cache:clear
ZIP installs: upload the new ZIP, then click Update in Extensions → My extensions.
Always run plugin:update: it re-applies the payment method's handler reference — skipping it can break checkout after an update. Update only this package, not all dependencies (--with-all-dependencies), so shared libraries stay on versions your Shopware release was tested with.
Uninstalling
Extensions → My extensions → ⋯ → Uninstall, or bin/console plugin:uninstall KommandhubPaystackSW.
- The Pay with Paystack payment method is deactivated, not deleted — existing orders reference it.
- Paystack data on orders (reference, transaction ID, fee) stays on the orders.
- If you choose not to keep plugin data, the Paystack Bank Fields custom-field set and all saved customer bank details are removed.