

Appearance
Taking payments
For merchants
This page follows one real test order from the storefront to the paid order in the Administration. Use it to check your own setup before you go live, and to know what your customers and staff will see.
The screenshots come from a demo shop in sandbox mode, selling in Nigerian naira (NGN). No real money moved.
Before you start
- The plugin is installed and Enable Sandbox Mode is on with your Test Secret Key saved (Configuration).
- Pay with Paystack is assigned to the sales channel you test with (Installation → Offer the payment method).
- The sales channel's currency is one your Paystack account accepts.
1. Add a product to the cart
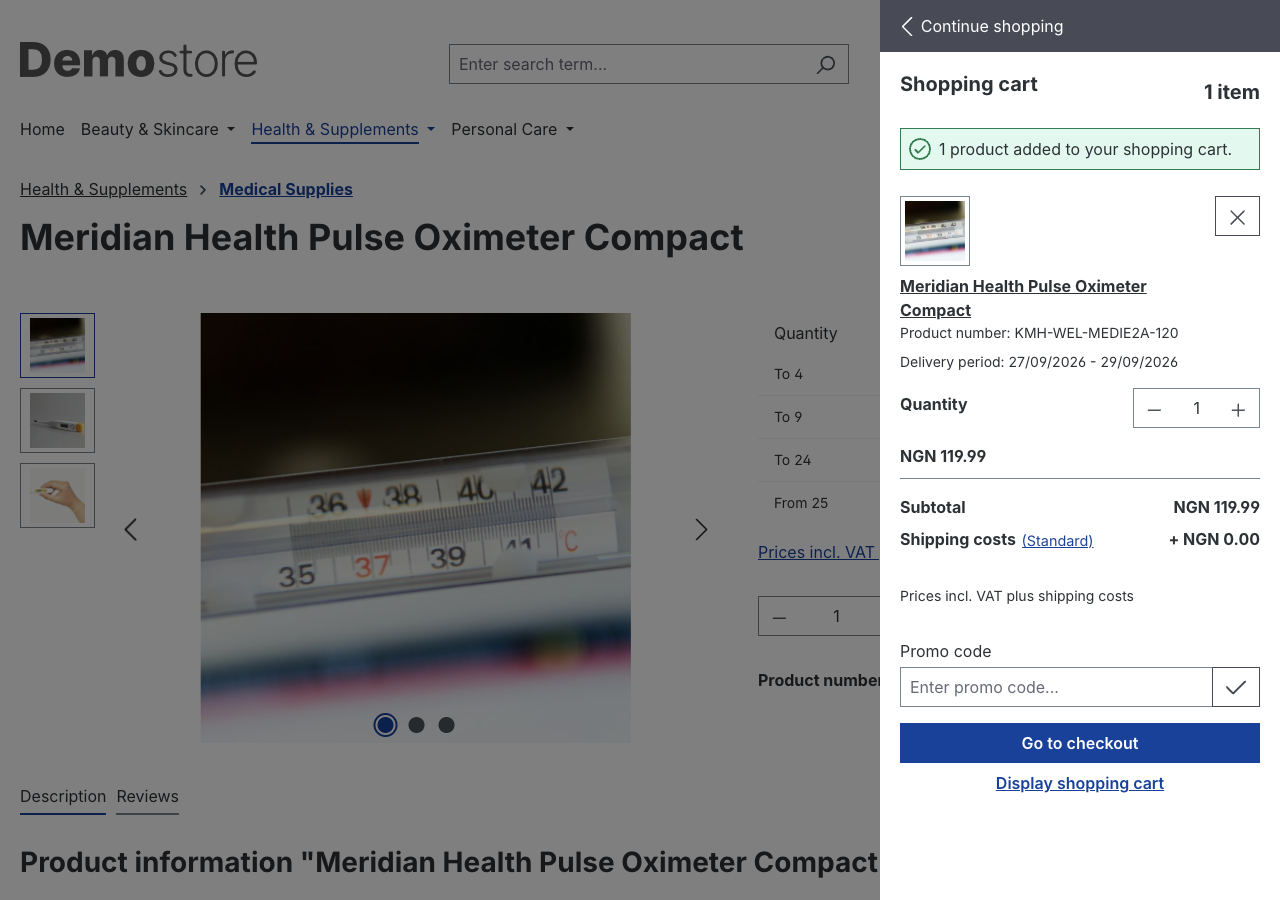
Open your storefront, open any product and click Add to shopping cart. The cart opens on the right. Click Go to checkout.
2. Enter the customer's details
Log in, or enter the details as a guest. In the test order, the customer checked out as a guest with an address in Lagos, Nigeria. Click Continue.
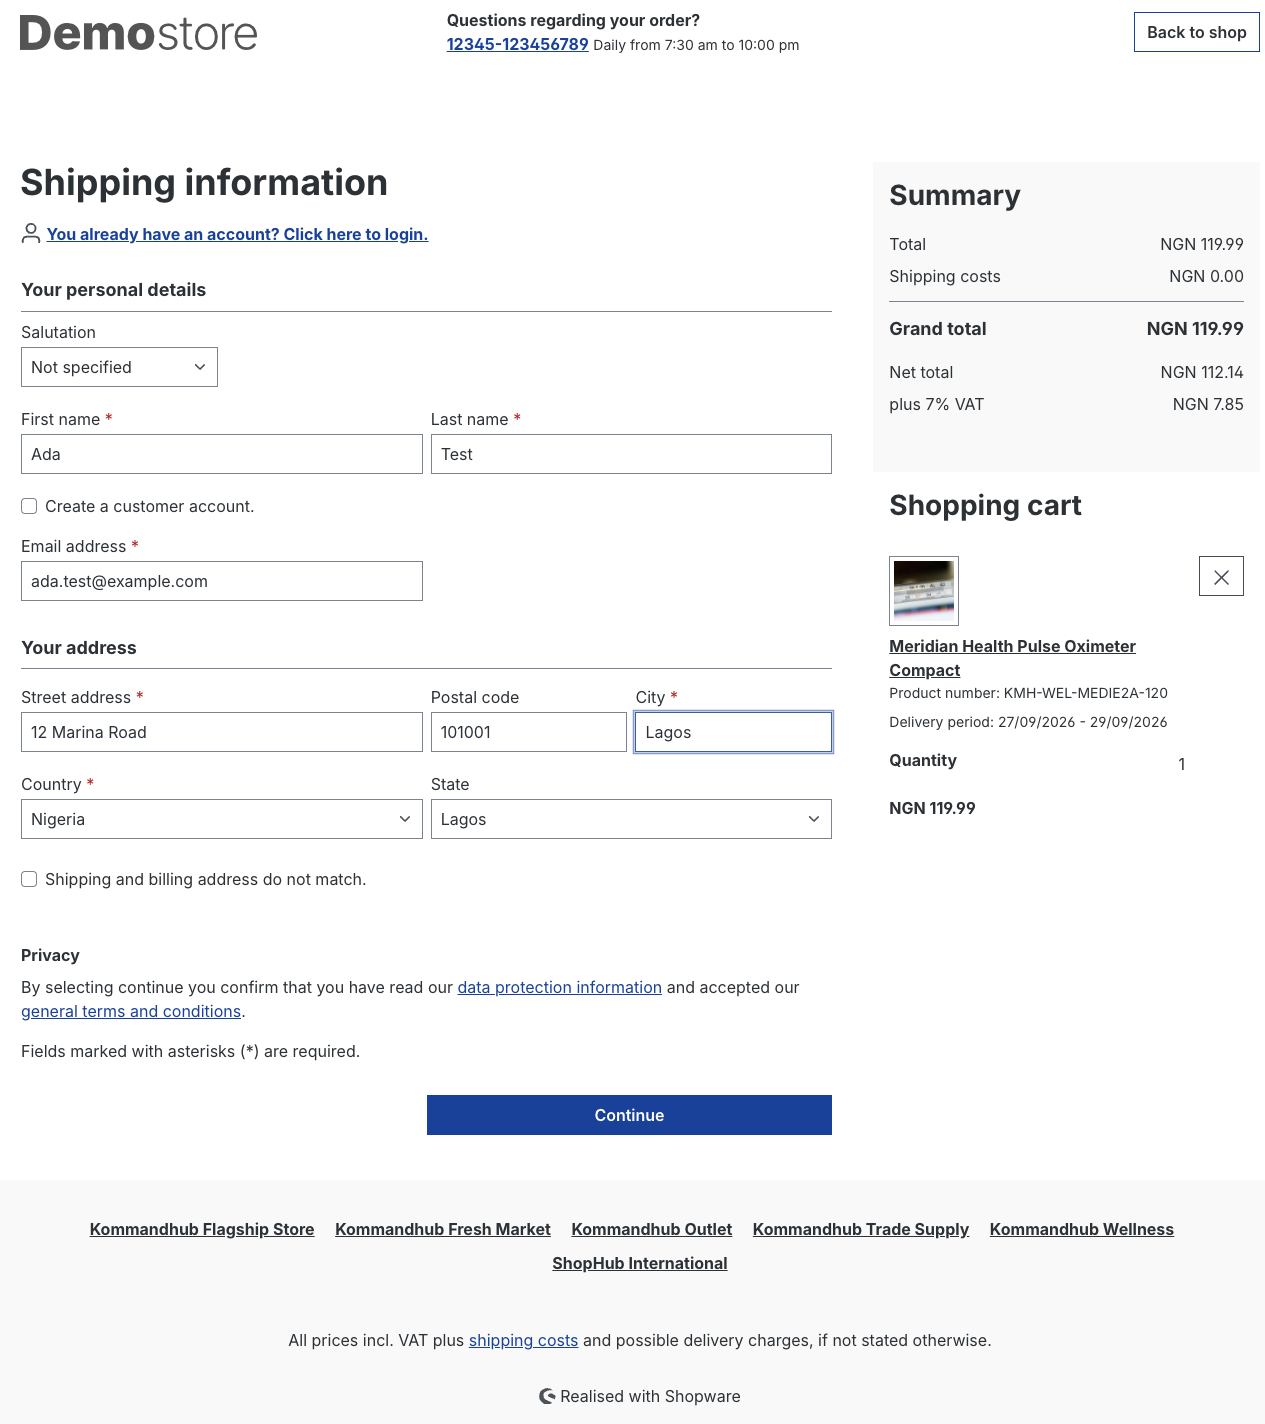
Nothing on this step is specific to Paystack — it is Shopware's normal checkout.
3. Choose Pay with Paystack and place the order
On the Complete order page:
- Under Payment method, select Pay with Paystack.
- Accept the terms and conditions.
- Click Submit order.
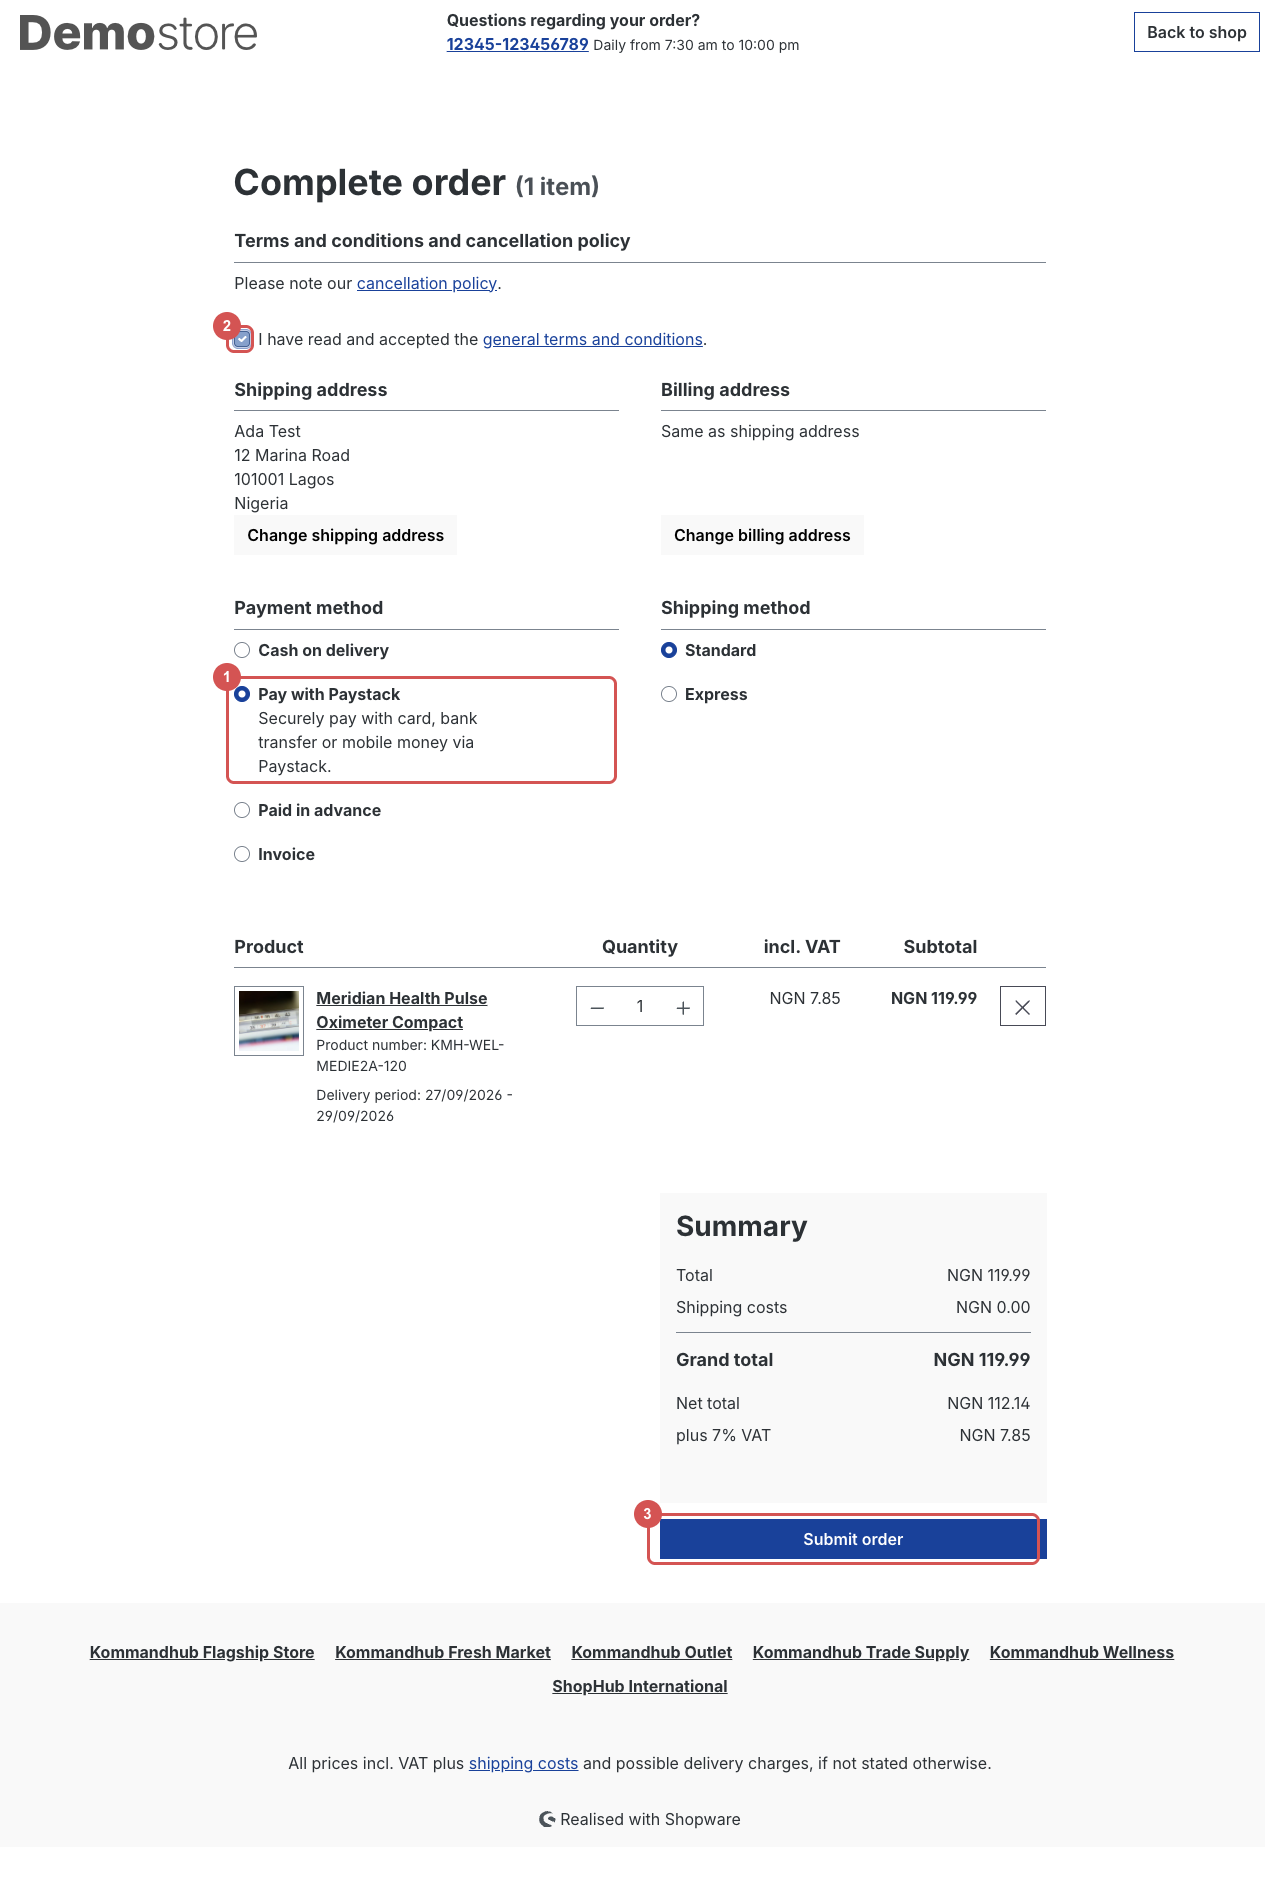
Shopware creates the order now, with payment status Open, and sends the customer to Paystack.
Not listed?
If Pay with Paystack is missing, see Troubleshooting. If a message says "Paystack is not configured correctly", the secret key for the active mode is empty for this sales channel.
4. The customer pays on Paystack
The customer lands on Paystack's hosted checkout at checkout.paystack.com. It shows your business name, the customer's email and the amount in the order currency. The customer chooses a channel on the left — which channels appear is set in your Paystack dashboard, not in Shopware.
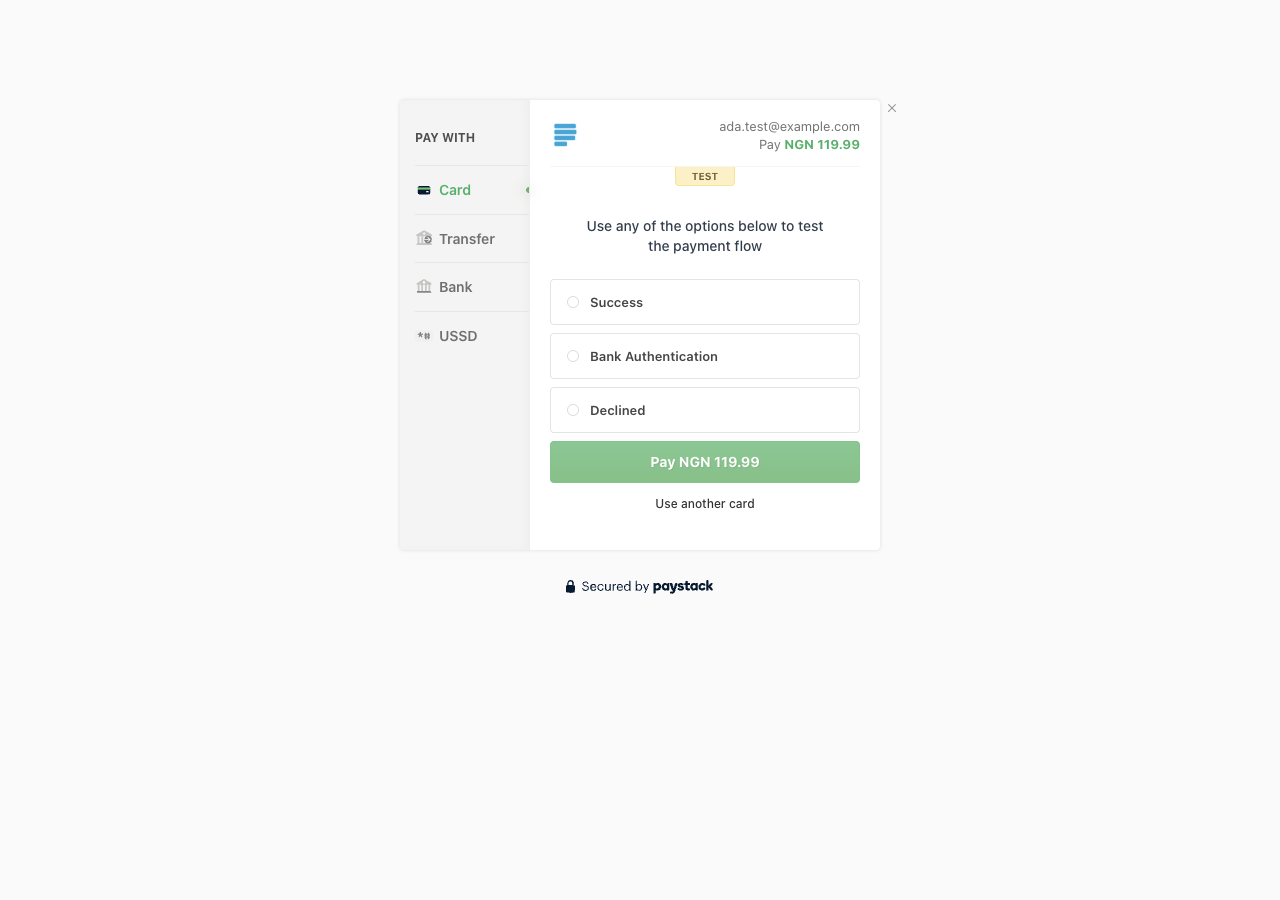
In sandbox mode the page carries a TEST badge, and Paystack offers ready-made outcomes such as Success, Bank Authentication and Declined, so you can try each result without real card details. For test card numbers and other channels, see Paystack: Test payments.
In live mode the customer sees the same page without the badge and pays with real details. Card data is entered on Paystack's page only — it never passes through your shop.
5. Back in your shop: order confirmed
After a successful payment Paystack sends the customer back to your shop. Before anything else, the plugin asks Paystack for the transaction and checks that the status, the amount and the currency match the order. Only when all three match is the order marked Paid. The customer then sees Shopware's normal confirmation page, and receives the order confirmation email if you use one.
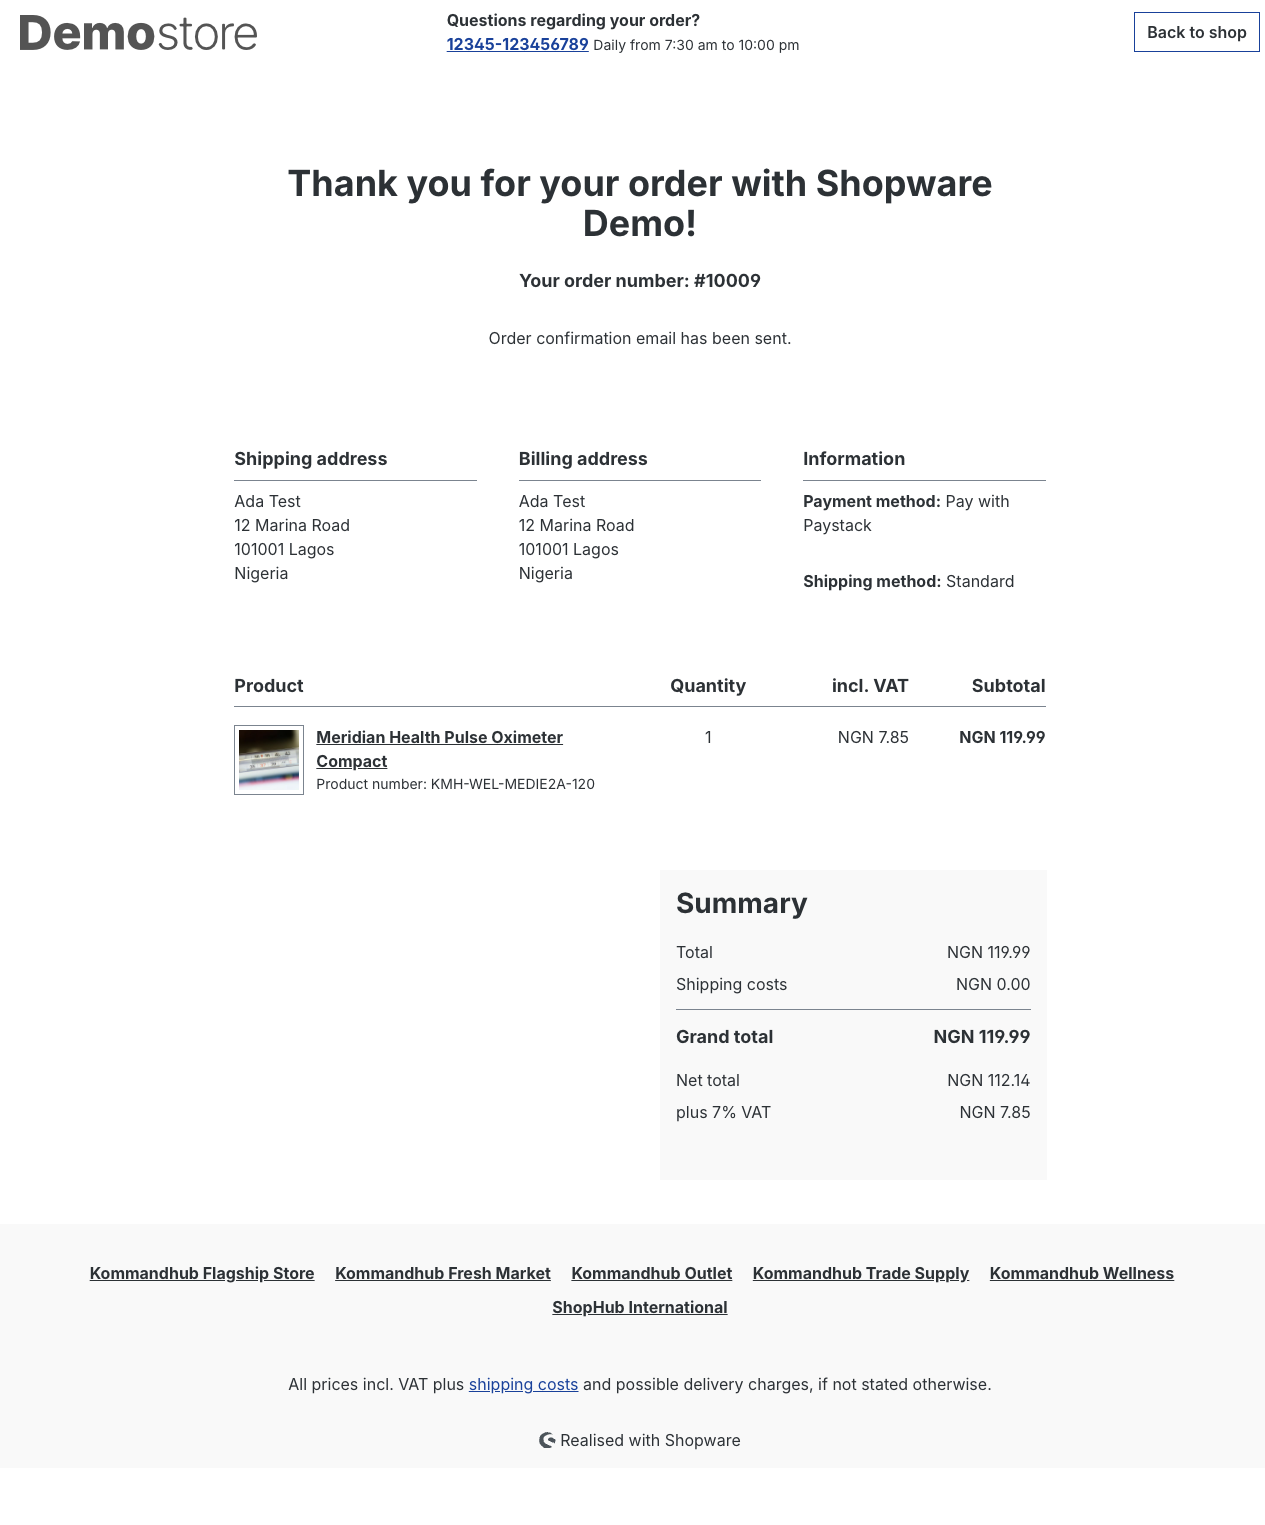
If the payment failed — for example it was declined, or the amount or currency does not match — the payment status becomes Failed and the customer is shown Shopware's payment-failed message. The customer can try again or pick another payment method. A payment that Paystack still reports as pending, ongoing or abandoned leaves the status Open; a later charge.success webhook can still mark it paid. The Pay with Paystack method allows paying again later from the order in the customer account, because Allow payment change after checkout is on for it.
When the customer does not come back
Some customers pay and close the browser before returning. Paystack then sends a charge.success webhook to your shop, and the plugin runs the same status, amount and currency check and marks the order Paid. Whichever arrives first wins; a payment is never booked twice.
This only works if your webhook URL is registered in the Paystack dashboard — see Installation → Register the webhook.
6. Check the order in the Administration
Open Orders. The new order is at the top, with payment method Pay with Paystack.
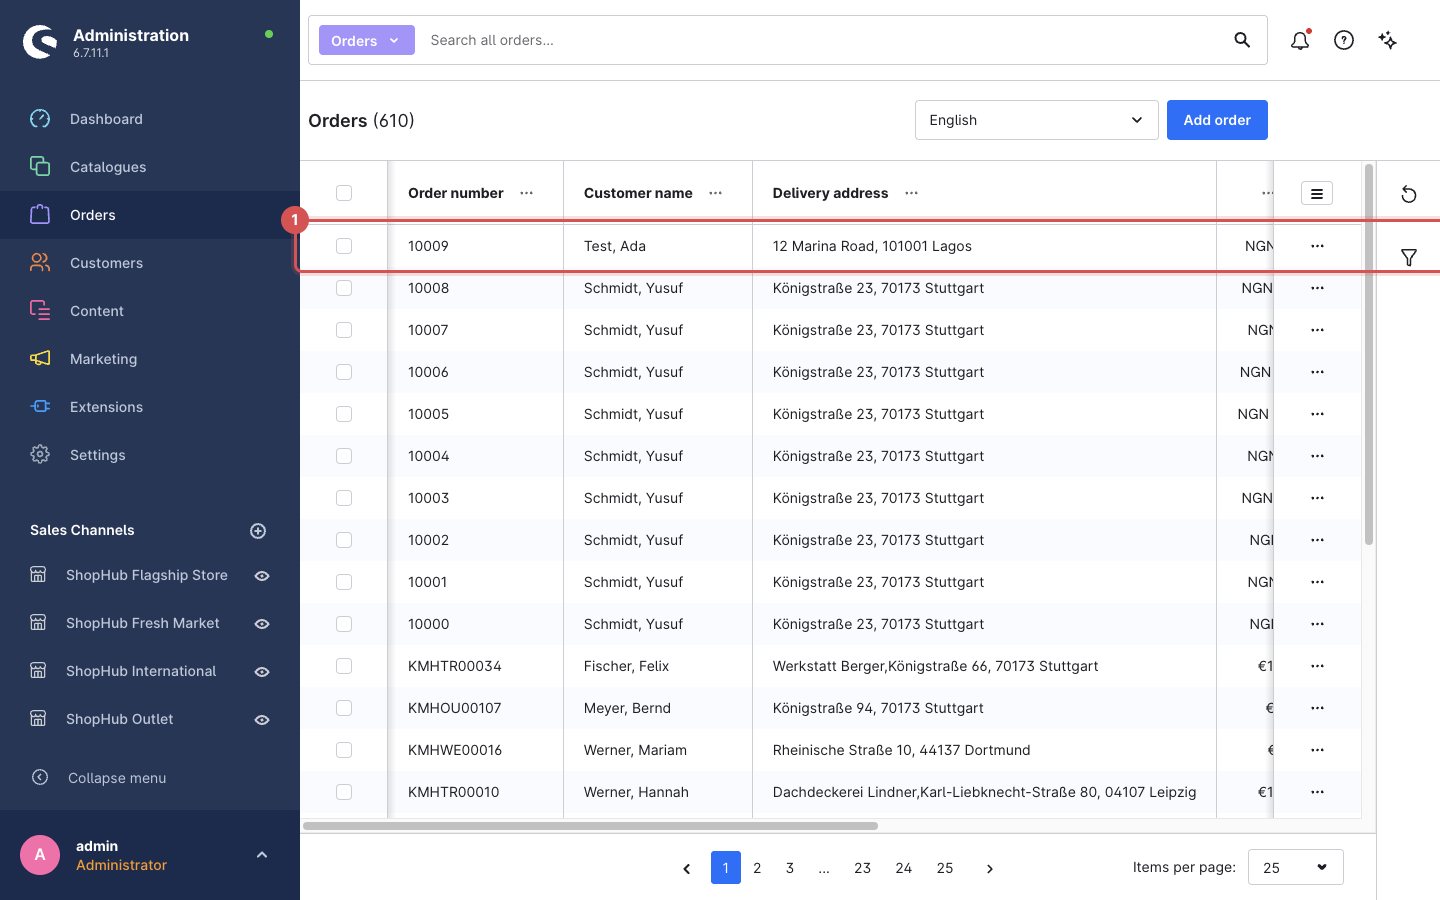
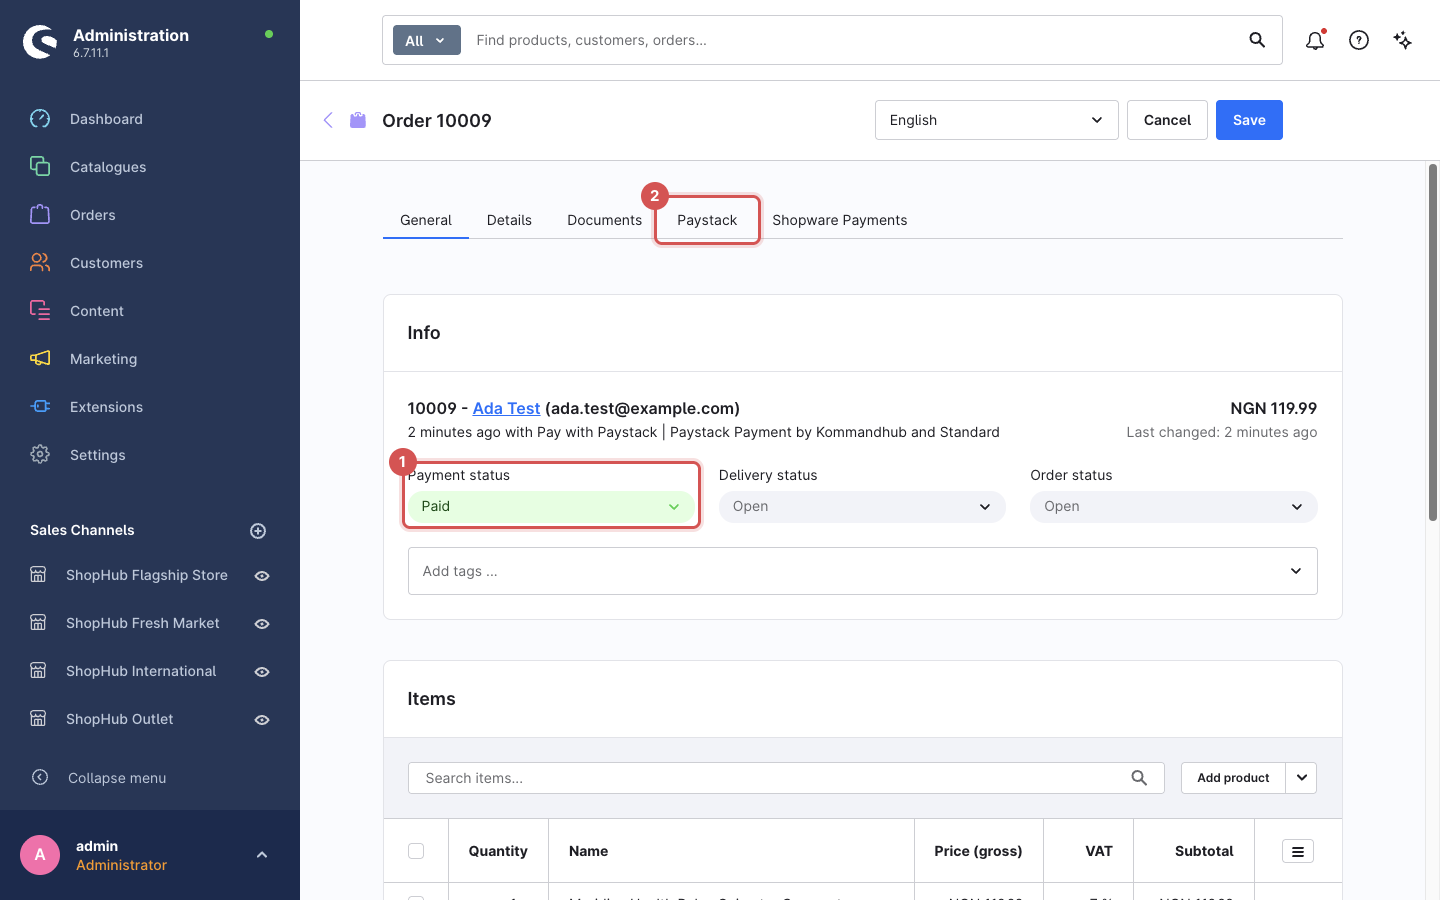
Open the order. On the General tab:
- The payment status is Paid.
- A Paystack tab has been added next to Documents.
7. The Paystack tab
Click the Paystack tab. It shows the Paystack transaction behind this order:
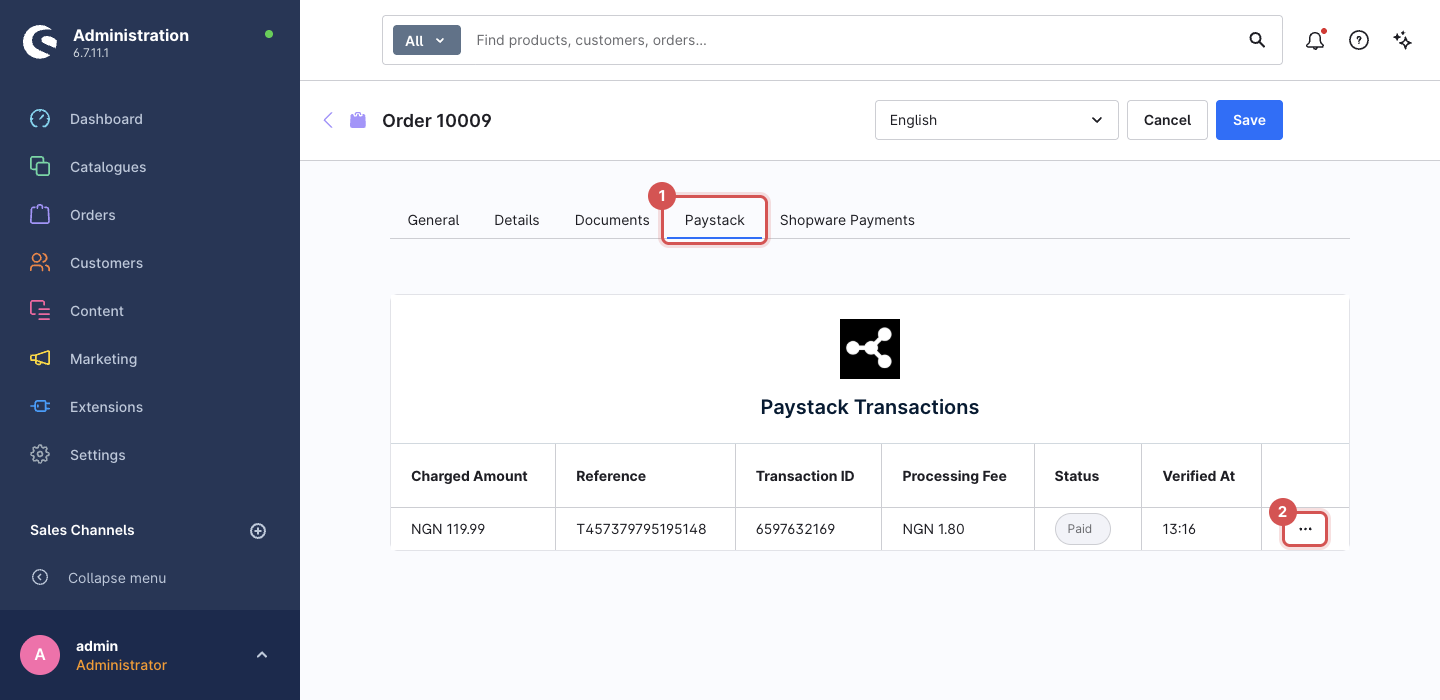
| Column | Meaning |
|---|---|
| Charged Amount | What Paystack charged, in the order currency |
| Reference | Paystack's transaction reference. Search for it in your Paystack dashboard to see the same payment there. |
| Transaction ID | Paystack's internal ID for the transaction |
| Processing Fee | Paystack's fee for this payment |
| Status | The order's payment status in Shopware |
| Verified At | When the plugin confirmed the payment with Paystack |
The ⋯ menu at the end of the row holds Refund — see Refunds. After a refund, a second card lists the refund history.
The tab only appears on orders paid with Paystack. If it says there is no Paystack transaction, the payment was never completed on Paystack.
The same values — plus the payment channel (card, bank transfer, USSD, …) — are stored on the order transaction as custom fields (paystack_reference, paystack_transaction_id, paystack_payment_type, paystack_transaction_fee, paystack_amount, paystack_currency, paystack_verified_at), so you can use them in exports and reports.
Amounts and currencies
The customer always pays in the order's currency. Paystack works in the smallest unit of a currency (kobo, pesewas, cents); the plugin converts every amount using the currency's decimal places, so zero-decimal currencies (XOF, RWF) and three-decimal currencies (KWD) are charged correctly. Add currencies in Shopware: Currencies and check that your Paystack account accepts them (Paystack: Supported currencies).
Try it yourself: test checklist
- Place an order with Success on the Paystack test page — the order becomes Paid, and the Paystack tab shows a reference.
- Place an order with Declined — the payment status becomes Failed, and the customer can try again.
- Place an order, pay with Success, and close the tab instead of returning — within a minute the order becomes Paid through the webhook.
- Make a small partial refund — see Refunds.